


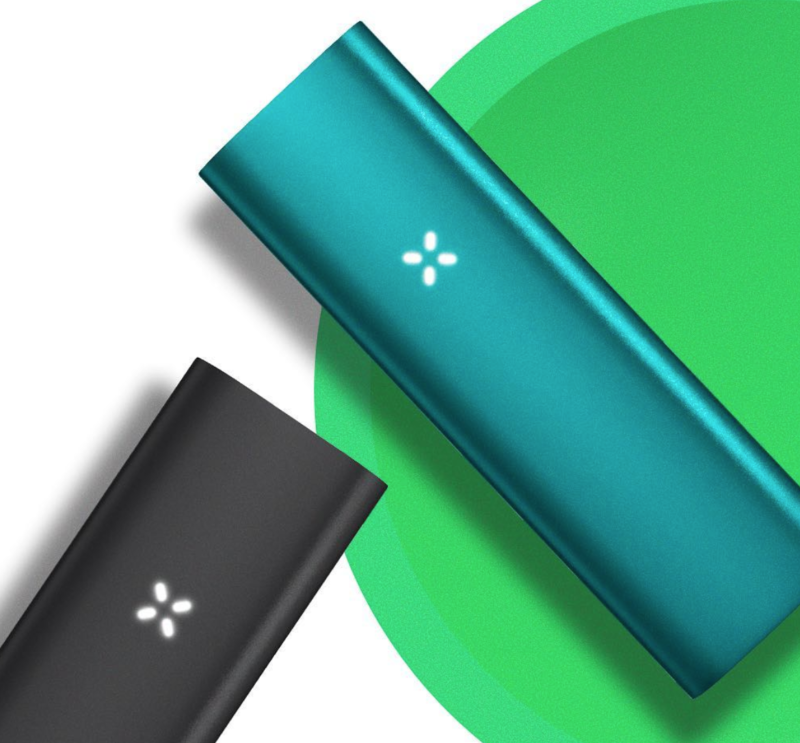
The PAX 3 Vaporizer is a popular choice among vaporizer enthusiasts for its sleek design and advanced features.
It offers a customizable temperature control system that allows users to fine-tune their vaping experience.
In this article, we will guide you through the process of changing the temperature on your PAX 3 Vaporizer, ensuring that you get the most out of your vaping sessions.
Understanding the PAX 3 Vaporizer

Before we delve into the details of changing the temperature on the PAX 3 Vaporizer, let’s take a moment to familiarize ourselves with this remarkable device.
The PAX 3 Vaporizer is a portable, handheld vaporizer that is designed to deliver smooth and flavorful vapor. It features a sleek and compact design, making it convenient to carry around in your pocket or bag.
With the PAX 3 Vaporizer, you can enjoy your favorite dry herbs and concentrates on the go, without the need for any additional equipment.
It offers a wide range of temperature settings, allowing you to customize your vaping experience to suit your preferences.
But what makes the PAX 3 Vaporizer truly stand out from the crowd? Let’s explore some of its key features:
Key Features of the PAX 3 Vaporizer
The PAX 3 Vaporizer boasts several impressive features that set it apart from other vaporizers on the market. Let’s take a look at some of its key features:
- Fast Heat-Up Time: The PAX 3 Vaporizer heats up in as little as 15 seconds, allowing you to start vaping in no time. This means you don’t have to wait long for your desired temperature to be reached, making it perfect for those who are always on the go.
- Customizable Temperature Settings: With the PAX 3 Vaporizer, you have full control over the temperature settings, allowing you to experiment with different heat levels for optimal vapor production. Whether you prefer a low and slow session or a quick and intense hit, the PAX 3 Vaporizer has got you covered.
- Dual-Use Functionality: The PAX 3 Vaporizer is compatible with both dry herbs and concentrates, giving you the flexibility to switch between different materials based on your preference. Whether you’re in the mood for a flavorful herb session or a potent concentrate experience, the PAX 3 Vaporizer can handle it all.
- Long Battery Life: The PAX 3 Vaporizer features a high-capacity battery that provides up to 8-10 sessions per charge, ensuring that you can enjoy uninterrupted vaping sessions. Say goodbye to constantly worrying about running out of battery and hello to long-lasting vaping pleasure.
Now that we’ve explored the impressive features of the PAX 3 Vaporizer, let’s dive into the importance of temperature control in vaporizers.
Importance of Temperature Control in Vaporizers

Temperature control is a crucial aspect of the vaping experience. Different compounds in dry herbs and concentrates are released at different temperatures, and finding the right temperature range can greatly enhance the flavor and potency of your vapor.
The PAX 3 Vaporizer offers a wide temperature range, allowing you to experiment with different heat levels to find the perfect balance that suits your personal preferences.
By adjusting the temperature, you can maximize the flavor and effects of your chosen material.
For example, lower temperatures are ideal for those who enjoy the delicate flavors and aromas of their dry herbs, as it allows for a more gentle extraction of the compounds.
On the other hand, higher temperatures are preferred by those seeking a more robust and intense vaping experience, as it can result in a stronger vapor production.
Furthermore, temperature control also plays a role in the efficiency of your vaping sessions. By finding the optimal temperature for your material, you can ensure that you are getting the most out of your dry herbs or concentrates, maximizing their potential and minimizing waste.
Overall, the ability to control the temperature on the PAX 3 Vaporizer empowers you to customize your vaping experience to your liking. Whether you’re a flavor enthusiast or a cloud chaser, the PAX 3 Vaporizer has the versatility to cater to your preferences.
Getting Started with Your PAX 3 Vaporizer

Before we dive into the process of changing the temperature on your PAX 3 Vaporizer, let’s make sure you have everything you need to get started.
Firstly, ensure that your vaporizer is fully charged.
If not, connect it to the provided USB charging cable and plug it into a power source. Once the device is fully charged, you are ready to proceed.
Charging Your PAX 3 Vaporizer
To charge your PAX 3 Vaporizer, follow these simple steps:
- Connect one end of the USB charging cable to the charging dock and the other end to a power source.
- Place your PAX 3 Vaporizer on the charging dock, ensuring that the metal contacts on the vaporizer align with the charging pins on the dock.
- Wait until the LED indicator on the vaporizer turns solid white, indicating that it is fully charged.
Once your PAX 3 Vaporizer is fully charged, you can remove it from the charging dock and proceed to the next step.
Loading Your PAX 3 Vaporizer
Now that your PAX 3 Vaporizer is charged and ready to go, it’s time to load your chosen material. Follow these steps to load your PAX 3 Vaporizer:
- Remove the magnetic oven lid from the bottom of the vaporizer.
- Grind your dry herbs or prepare your concentrate.
- Fill the oven chamber of the vaporizer with your material, ensuring not to overpack it.
- Replace the oven lid by simply snapping it back in place.
Your PAX 3 Vaporizer is now loaded and ready for use. It’s important to note that the PAX 3 Vaporizer is designed for optimal performance when the oven chamber is fully packed. However, you can experiment with different packing densities to achieve your desired vapor production.
Step-by-Step Guide to Changing the Temperature
Now that you have familiarized yourself with the PAX 3 Vaporizer and have charged and loaded your device, we can move on to the main topic: changing the temperature on your PAX 3 Vaporizer.
Follow these step-by-step instructions to ensure a seamless temperature adjustment process.
Turning on the PAX 3 Vaporizer
The first step in changing the temperature on your PAX 3 Vaporizer is turning on the device. To turn on your PAX 3 Vaporizer, simply press the power button located on the mouthpiece for one second. The LED indicator will light up, indicating that the vaporizer is powered on and ready for use.
Accessing the Temperature Settings
Once your PAX 3 Vaporizer is turned on, accessing the temperature settings is a breeze. Follow these steps to access the temperature settings:
- With the device turned on, gently shake the PAX 3 Vaporizer.
- The LED indicator will display a color, indicating the current temperature setting.
- Rotate the vaporizer to cycle through the available temperature settings.
- Stop rotating when the desired temperature setting is displayed.
Adjusting the Temperature
After accessing the temperature settings, it’s time to adjust the temperature to your preferred level. Follow these steps to adjust the temperature:
- Press and hold the power button for two seconds to enter temperature adjustment mode.
- The LED indicator will begin pulsing, indicating that you are now in temperature adjustment mode.
- Rotate the vaporizer to increase or decrease the temperature level.
- Release the power button once you have reached your desired temperature.
That’s it! You have successfully changed the temperature on your PAX 3 Vaporizer. Take a moment to ensure that the LED indicator displays the correct temperature setting before proceeding with your vaping session.
Tips for Optimal Temperature Settings
Now that you are familiar with the process of changing the temperature on your PAX 3 Vaporizer, let’s explore some tips for finding the optimal temperature settings for your vaping sessions.
Ideal Temperature for Different Materials
Different materials require different temperature settings to bring out their unique flavors and effects. Here are some general temperature recommendations for popular vaping materials:
- Dry Herbs: Start with a lower temperature setting around 350°F (175°C) for a more flavorful experience. Increase the temperature gradually to 400°F (205°C) for stronger vapor production.
- Concentrates: Concentrates usually require higher temperature settings. Start at around 450°F (232°C) and adjust as needed.
Remember, these are just starting points, and everyone’s preferences may vary. Feel free to experiment with different temperature ranges to find the sweet spot that suits you best.
Understanding the Impact of Temperature on Vapor Quality
The temperature at which you vape plays a significant role in the overall vapor quality. Here are a few pointers to keep in mind:
- Lower temperatures produce smoother and more flavorful vapor, but with less visible vapor clouds.
- Higher temperatures result in denser vapor clouds but may sacrifice some of the flavor.
- Experiment with different temperature settings to strike the perfect balance between vapor production and flavor intensity.
Remember that individual preferences may vary, so it’s essential to find the temperature range that suits you best.
Troubleshooting Common Issues
While the PAX 3 Vaporizer is known for its reliability, occasional issues may arise. Here are some troubleshooting tips to help you resolve common issues:
What to Do If Your PAX 3 Won’t Change Temperature
If your PAX 3 Vaporizer is not changing temperature despite following the instructions, try the following steps:
- Ensure that your device is fully charged.
- Turn off your vaporizer and turn it back on.
- Perform a firmware update on your PAX 3 Vaporizer if available.
If the issue persists, contact PAX customer support for further assistance.
Resolving Other Common PAX 3 Issues
If you encounter any other issues with your PAX 3 Vaporizer, such as poor vapor quality or connectivity problems, try the following troubleshooting steps:
- Clean the vapor path and oven chamber of your PAX 3 Vaporizer regularly to ensure optimal performance.
- Ensure that your material is properly ground and packed in the oven chamber.
- Check the mouthpiece for any debris or obstructions and clean if necessary.
- Make sure that your PAX 3 Vaporizer is running the latest firmware version.
If the issue persists, refer to the PAX 3 Vaporizer user manual or contact PAX customer support for further assistance.
And there you have it – a comprehensive guide on how to change the temperature on the PAX 3 Vaporizer. By following these instructions, you can enjoy a personalized vaping experience that perfectly suits your preferences.
Remember to experiment with different temperature settings and materials to discover the ultimate combination that delivers the best flavor and vapor quality.
Happy vaping!