- Why Is It Called a “Boro” Anyway?
- What Actually Is a Boro Mod?
- The Three Pillars of Every Boro Setup
- Boro Anatomy: How It All Connects
- Boro vs Pod Systems vs Standard Box Mods
- Essential Terminology Every Boro User Needs
- How to Choose Your First Boro Setup
- Managing Condensation: The One Thing Nobody Tells You
- Troubleshooting Common Boro Problems
- Boro Compatibility: What Fits What
- Wrapping Up
- FAQ
So you’ve seen the word “Boro” thrown around vaping forums and Reddit threads, and you’re not totally sure what it means.
Or maybe you already know the basics but want to figure out if a Boro setup is actually worth the upgrade from your current pod kit.
Either way, you’re in the right place. This was me in 2023. I knew about these devices but I hadn’t really explored them properly. Fast-forward a couple of years and they’re now pretty much all I use.
These are the boro mods I currently recommend BTW, across a range of price points and experience level.
This guide covers why. But it’ll also explain the history, the anatomy of how these devices work, how to choose your first setup, and how to avoid the mistakes that cost most beginners time and money.
Let’s get into it.
Why Is It Called a “Boro” Anyway?
Here’s a fun piece of trivia that most people gloss over.
The word “Boro” is short for borosilicate glass, which is the same heat-resistant glass used in laboratory equipment and Pyrex cookware.
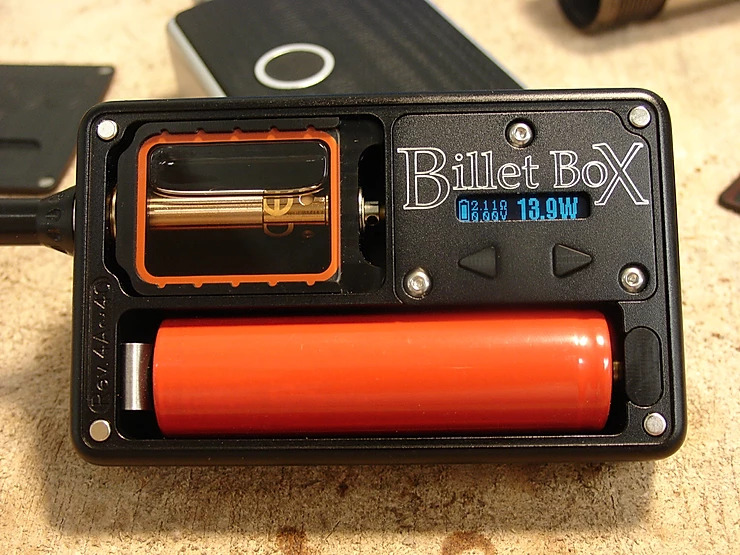
The original Boro tank for the Billet Box Rev 4 used a sliding borosilicate glass panel as the front fill window, and the name stuck.
Over time, many modern Boro-style tanks and AIOs have switched to PCTG or polycarbonate fronts for impact resistance and more colour options, but the name has become a permanent fixture in the vaping vocabulary regardless of what material the front panel is actually made from.
Borosilicate glass has a much lower coefficient of thermal expansion than regular glass, which is why it can handle rapid temperature changes without cracking.
The same property that makes it ideal for chemistry labs makes it pretty handy for a device that sits next to a heating coil all day.
Now, about the Rev 4. If you’ve spent any time in Boro communities, you’ve probably seen “Rev 4 compatible” listed as a spec on tanks and bridges.
The Billet Box Rev 4, released by Billet Box Vapor, is the device that established the standard tank format and positive pin placement that virtually every third-party Boro manufacturer now builds around.
Think of Rev 4 as the USB standard of the Boro world.
It’s the compatibility baseline. Before Rev 4 standardised the format, Billet Box revisions used different tank configurations that didn’t play nicely with third-party accessories.
Rev 4 changed all of that, turning the Billet Box from a closed system into an entire ecosystem.
What Actually Is a Boro Mod?
Before we go deeper, let’s nail down the definition.
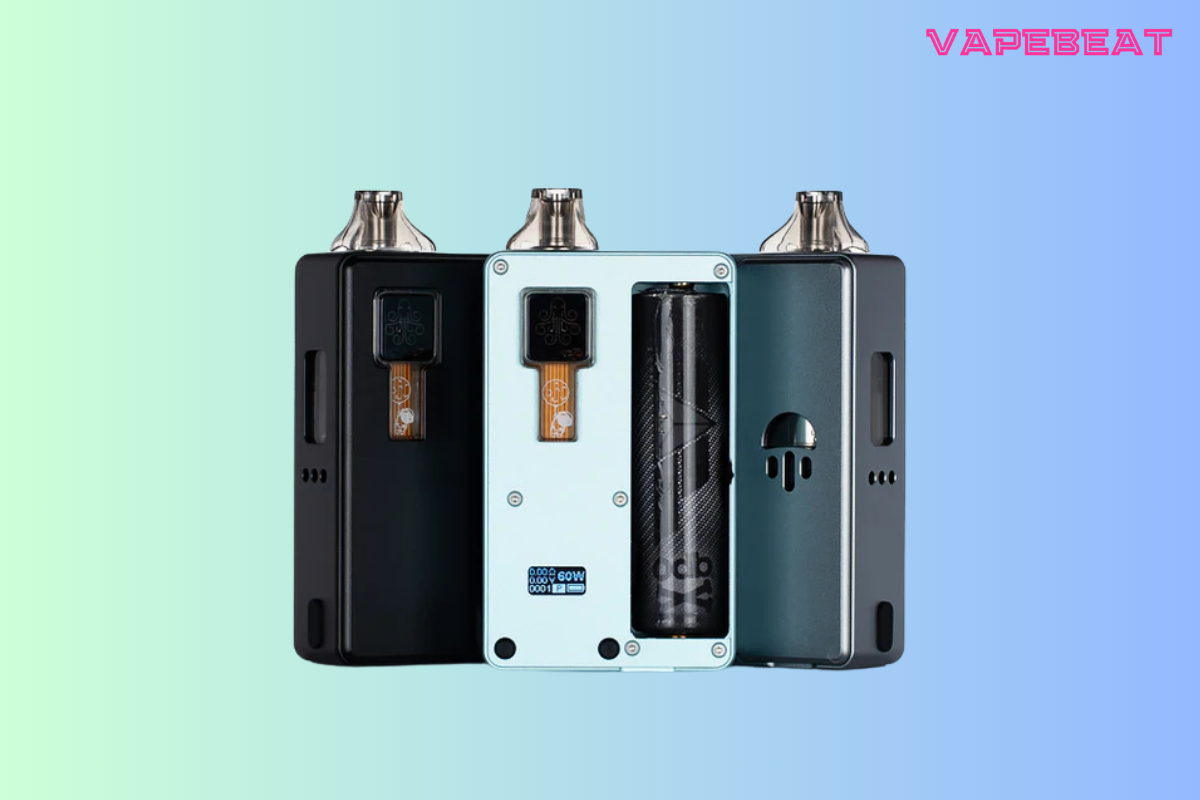
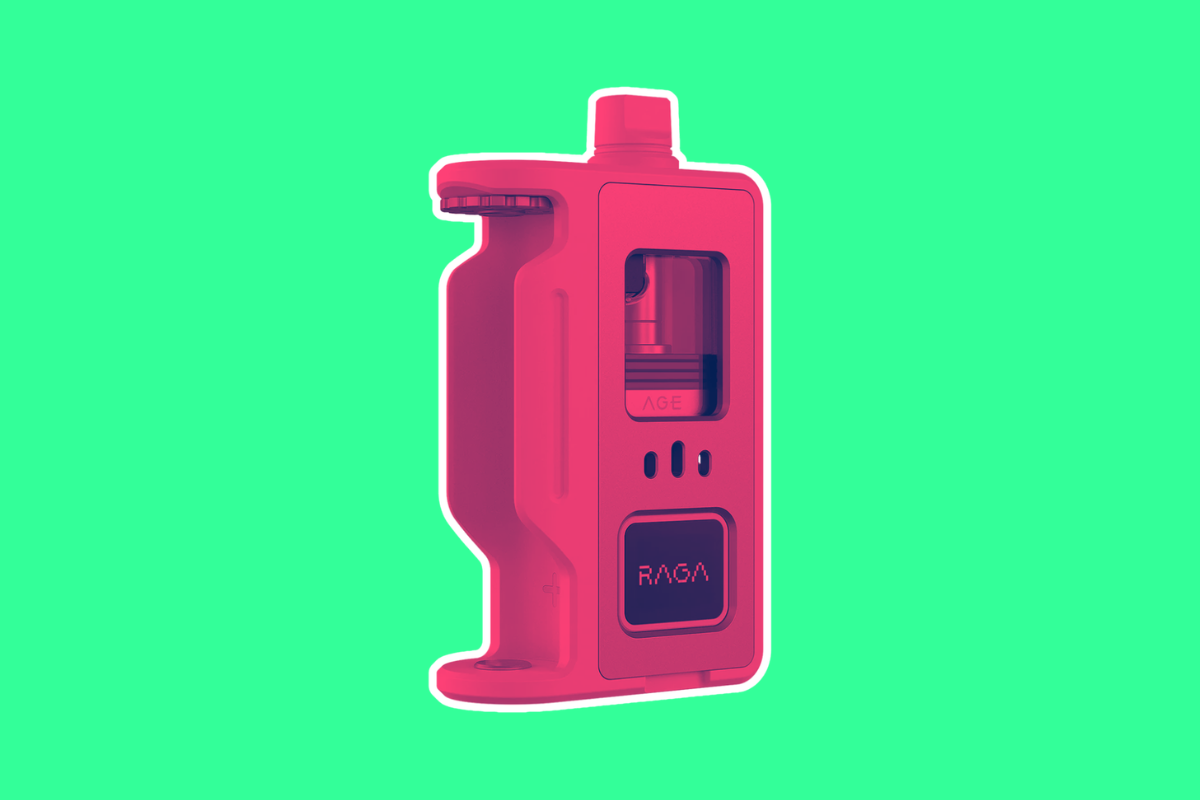
A Boro mod is a box-shaped all-in-one device that houses a battery (usually a single 18650 or 21700) beside a standardised tank. That side-by-side layout is what gives Boro mods their distinctive boxy profile and where the “box mod” part actually makes sense, because the battery and tank sit next to each other rather than one above the other like in a typical pod kit.
Inside the tank sits a component called a bridge.
The bridge is the heart of the whole setup, and we’ll break it down in detail below.
Boro mods are more expensive and more technical than pod kits, but they’re infinitely more tunable, more durable, and in the hands of the right user, they deliver a flavour and draw experience that pods genuinely can’t match.
The Three Pillars of Every Boro Setup
Think of a Boro as three independent purchases that you assemble into one device.
Getting any one of these wrong can undermine the whole setup, so it’s worth understanding what each one does.
The Mod (Your Chipset and Frame)
The mod itself is basically a battery housing with a chipset that controls power delivery. This is where the biggest price and performance differences live.
- DNA-equipped mods sit at the top of the food chain. Chips from Evolv, specifically the DNA60, DNA60C, and DNA80C, deliver extremely precise power output, accurate resistance readings, full temperature control support, and deep customisation through Evolv’s Escribe software. If you want wattage curves, material-specific temperature limits, and granular control over every aspect of your vape, DNA is the answer. The trade-off is price. Genuine DNA-equipped Boro mods typically start around $130 and can run well over $200 for boutique or custom panel versions.
- Proprietary and budget chipsets power the more accessible end of the market. These usually top out around 60-80W, offer basic wattage mode and sometimes bypass or variable voltage, and skip the advanced features. For a lot of vapers, that’s completely fine. If you’re not interested in temperature control or software configuration, a solid proprietary board in a well-machined frame can serve you extremely well at a fraction of the DNA cost. Entry-level Boro AIOs with decent proprietary chips generally land in the $70-100 range.
The $30-$50 era belongs to pod kits.
True Boro setups, even at the budget end, generally cost more because you’re paying for a real battery (not a small internal pack), better build quality, and an open ecosystem of accessories.
The Tank (Your Reservoir)
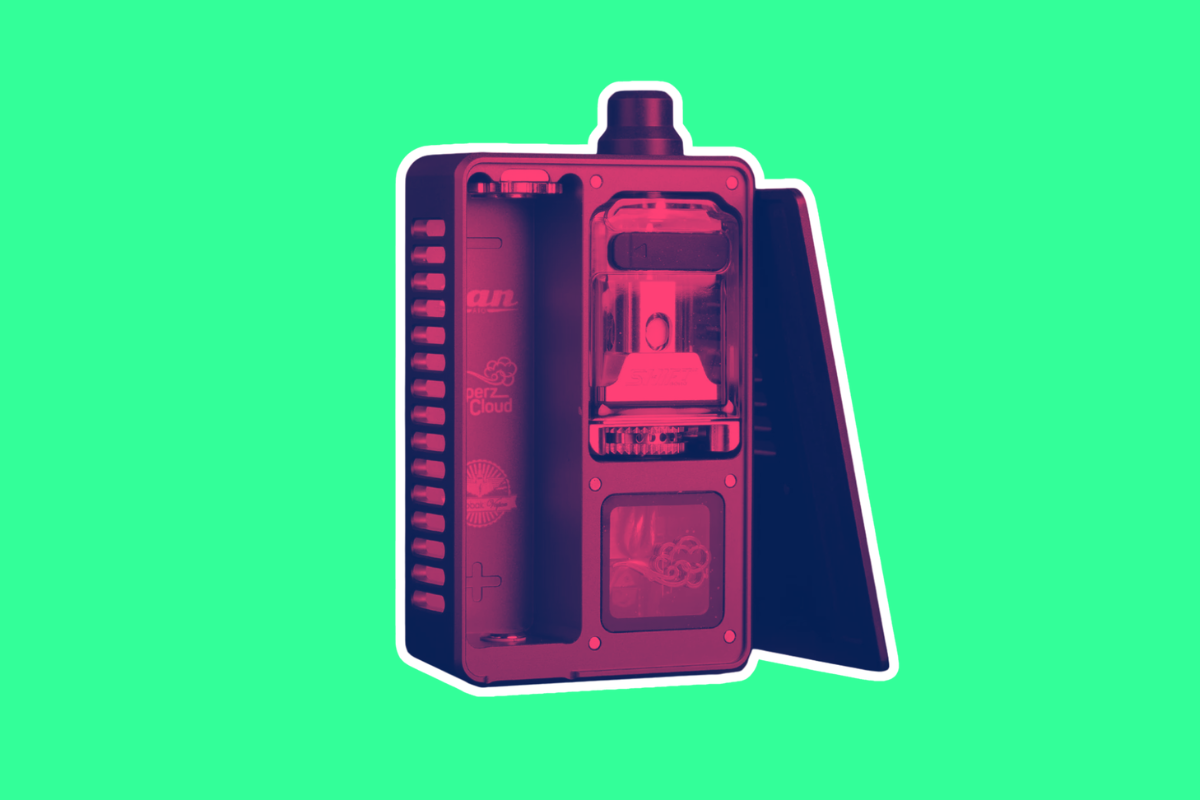
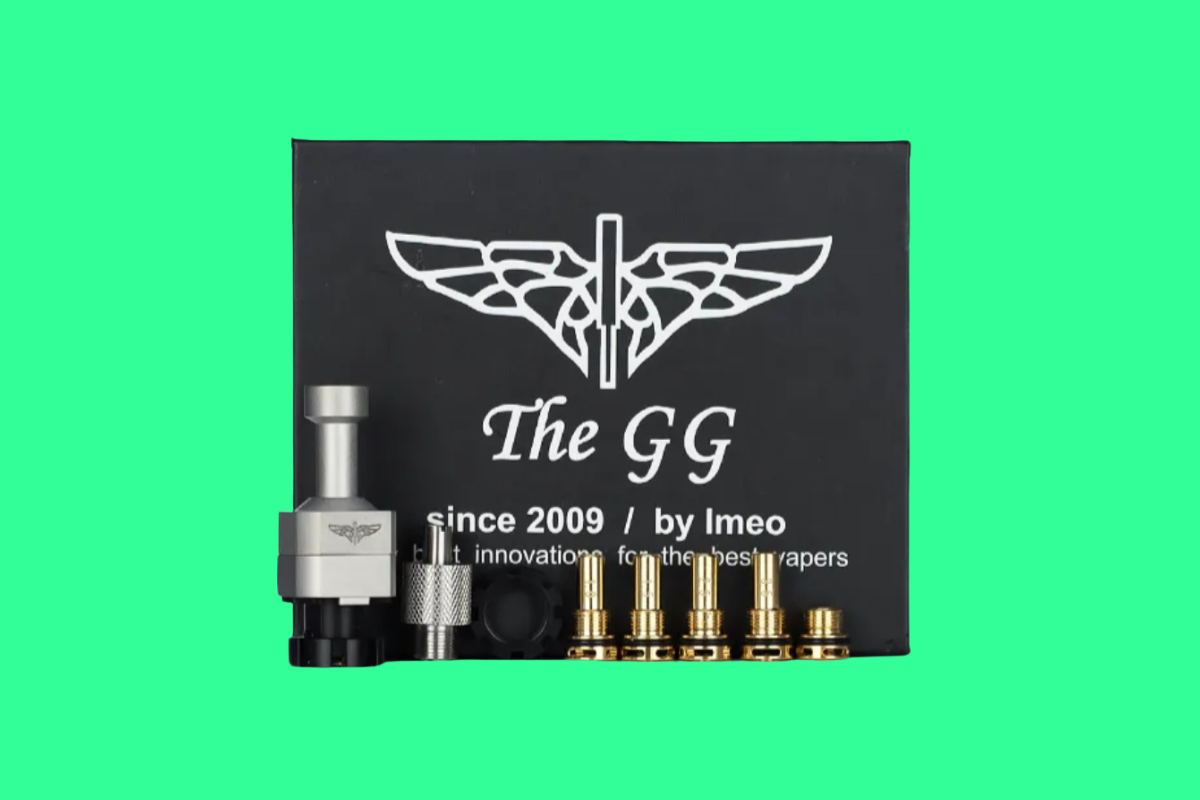
The standard Rev 4 Boro tank holds around 5-5.5ml of e-liquid, uses a sliding front panel for filling, and has a large opening at the bottom where the bridge slots in and makes contact with the positive pin.
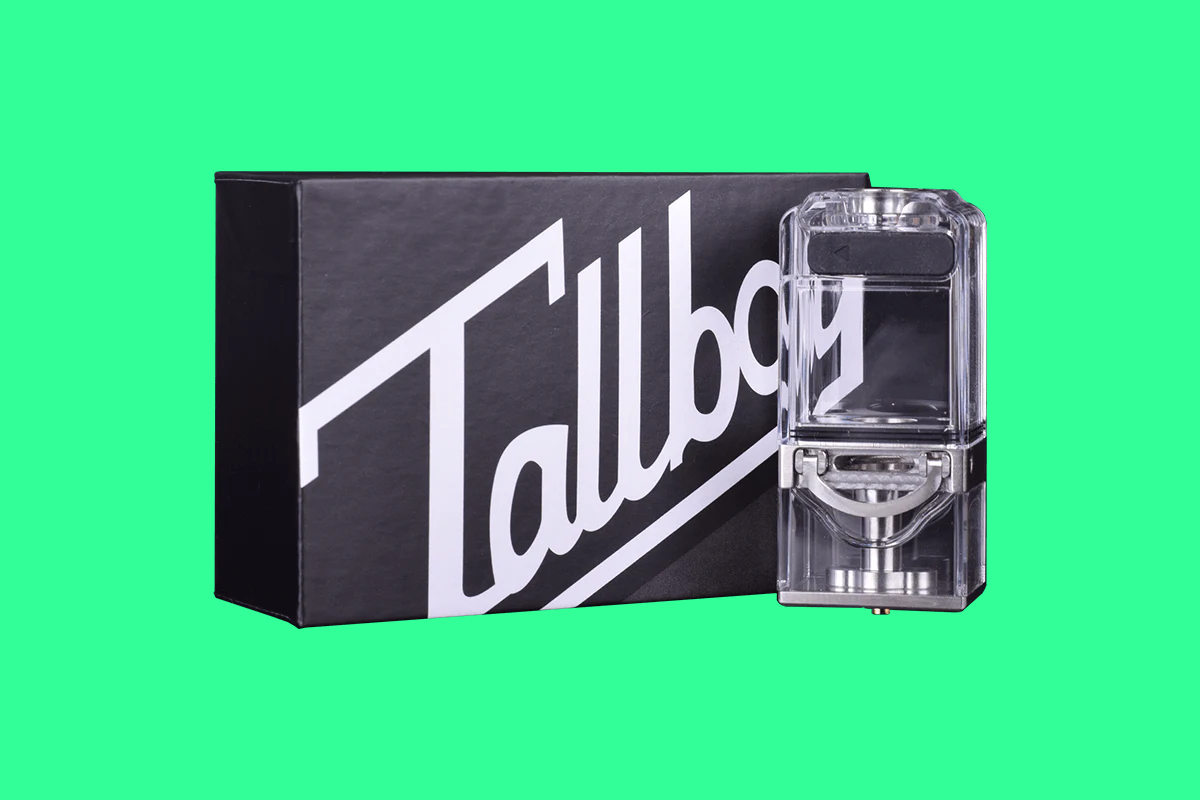
Beyond the standard Rev 4 format, you’ll also find integrated tanks designed around specific RBA bridges.
These include options like Bishop-style tanks, Snail tanks, and various boutique versions that trade universal compatibility for optimised airflow, easier building, or improved condensation management.
Integrated tanks tend to appeal to flavour chasers who’ve already found their preferred bridge and want a setup optimised around it.
Standard Rev 4 Boro tanks are the smarter choice if you’re still experimenting and want maximum flexibility.
The Bridge (The Soul of the Setup)
This is where a Boro setup really differentiates itself from everything else on the market.
The bridge is an adapter that sits inside the tank, wicks e-liquid from the tank reservoir, heats it through a coil, and directs vapour up through a chimney section and into the drip tip.
But what makes bridges special is that they come in two fundamentally different flavours.
- Stock coil bridges accept pre-made coils from other ecosystems. There are bridges built for Voopoo PnP coils, Aspire Nautilus coils, SMOK Nord coils, RPM coils, and more. If you’re coming from a pod kit and already love a particular coil, a compatible bridge lets you drop that coil into a Boro setup without learning to build your own. It’s the ideal on-ramp for pod users moving to the Boro world.
- RBA bridges are full rebuildable atomisers in a compact format. You install your own coil wire and cotton, wick it yourself, and rebuild when performance drops. The cost per coil drops dramatically compared to buying premade coils, and you get total control over resistance, wire material, and airflow. The trade-off is a steeper learning curve and more sensitivity to wicking errors. A poorly wicked RBA will either flood (too loose) or dry hit (too tight).
Some RBA bridges use a bottom-feed wicking style similar to squonk atomisers, while others use a more conventional top-feed wick that drapes down into juice channels. The wicking method affects how the bridge responds to different vaping styles and liquid viscosities.
Boro Anatomy: How It All Connects
Understanding how these pieces physically interact will save you a lot of troubleshooting headaches later. Here’s how to picture it:
- The tank is the outer shell that holds your e-liquid. It has a large aperture at the bottom through which the bridge drops in, and the front panel slides to reveal the fill port.
- The bridge sits inside the tank. At the bottom, the bridge has a protruding 510 positive pin that makes electrical contact with the positive pin inside the Boro bay of the mod. At the top, the bridge’s chimney section aligns with the vapour path leading up to the drip tip.
- The flush nut is a metal ring that screws into the top of the Boro bay in the mod. When tightened, it clamps the tank and bridge securely in place and completes the vapour path. On many mods, the flush nut also serves as the drip tip adapter. On others, an integrated drip tip replaces the separate nut and tip with a single component that both clamps the tank and functions as the mouthpiece.
- The airflow pin sits under the coil in most RBA bridges. By swapping to a pin with a larger or smaller bore, you shift the draw from tight mouth-to-lung all the way to loose direct lung. This single component does more to change your vaping experience than almost anything else in the setup, and switching pins costs almost nothing compared to buying a whole new device.
When you’re assembling the device, the sequence goes like this: install your coil or build your RBA in the bridge, insert the bridge into the tank and align the juice ports and chimney, slide the loaded tank into the Boro bay in the mod and ensure the positive pin is centred, then tighten the flush nut until snug.
Check the resistance reading on the mod, test-fire at a low wattage, and then adjust upward.
Boro vs Pod Systems vs Standard Box Mods
Not sure which direction is right for you? Here’s the breakdown.
| Feature | Pod System | Boro AIO | Standard Box Mod + Tank |
|---|---|---|---|
| Price (device) | $20-$60 | $70-$200+ | $30-$150+ |
| Coil cost (monthly) | $15-$30 | $5-$20 (stock) / <$5 (RBA) | $15-$30 |
| Battery life | Short (internal pack) | Full day (18650/21700) | Full day+ (dual 18650/21700) |
| Portability | Excellent | Very good | Moderate |
| Tuning options | Minimal | Extensive | Moderate-High |
| Rebuild capability | None | Optional (RBA bridge) | Depends on tank |
| Learning curve | Minimal | Moderate-High | Low-Moderate |
| Durability | Low-Moderate | High | Moderate |
| Best for | Smokers switching / casual vapers | Hobbyists and experienced vapers | Cloud chasers, high-wattage users |
If you’re new to vaping entirely, a pod kit is still the lowest-friction place to start. Check out our complete beginner’s guide before you go spending $150 on a Boro setup you’re not sure how to use yet.
If you’re an experienced pod user who’s frustrated by short battery life, coil costs, or the lack of airflow control, a Boro AIO is probably the most logical next step.
You get a real battery, a rebuildable option when you’re ready for it, and a level of customisation that no pod kit can offer.
Standard box mods with tanks are worth considering if you prioritise raw wattage and cloud output over portability.
Boro mods are generally capped around 60-80W, which is more than enough for MTL and RDL vaping but leaves something to be desired for aggressive direct lung setups.
Essential Terminology Every Boro User Needs
- Rev 4 compatible: Means the tank or bridge is built to fit the standard Billet Box Rev 4 cavity dimensions and positive pin placement. Most modern Boro mods use this standard.
- Flush nut: The metal ring that threads into the top of the Boro bay to lock the tank in place. Hand-tight is usually sufficient. Over-tightening stresses the positive pin and can cause resistance jumps, leaks, or a cracked tank.
- Integrated drip tip: A single component that replaces the separate flush nut and tip. Cleaner look, fewer parts, but less flexibility in tip height and style.
- Airflow pin: The small insert under the coil in an RBA bridge that determines how much air passes through to the coil. Larger bore equals more airflow. Swapping pins is one of the most impactful and cheapest ways to tune your draw.
- Condensation plug: A small insert that sits under the Boro tank in the mod’s cavity and channels moisture away from the chipset and screen. Useful for heavy users, high-wattage RDL builds, or anyone using a mod with a screen close to the tank opening.
- Positive pin: The electrical contact at the base of the Boro bay that connects with the positive pin of the bridge, completing the circuit. If these don’t make solid contact, you’ll get “Check Atomizer” errors.
- PnP, Nord, RPM, Nautilus bridges: These are stock coil bridges named after the coil ecosystem they’re designed to accept. If you see a Boro bridge described as “PnP compatible,” it means you can drop a Voopoo PnP coil straight in.
How to Choose Your First Boro Setup
There are a few questions worth answering before you spend any money.
- What coils do you already love? If you’re coming from a pod kit and you’ve found a coil you really like, check whether a compatible bridge exists before buying anything else. This can make the transition much smoother than starting from scratch.
- Are you ready to learn to build? RBA bridges unlock the best long-term performance and lowest running costs, but they require patience. If you’re not there yet, start with a stock coil bridge and learn to build when you’re comfortable with the rest of the setup.
If so, these are the best boro setups you can buy right now.
Is A Boro Mod Right For Me?
If you’re an ex-pod user who wants something familiar, look for a Boro AIO that ships with a PnP or Nautilus-compatible bridge and runs a simple proprietary chipset.
You keep your familiar coils, gain a significantly better battery, and have a clear upgrade path to RBA when you’re ready.
If you’re a hobbyist or flavour chaser who wants to go all-in, a DNA60 or DNA80C Boro mod paired with a well-regarded RBA bridge and an integrated tank optimised for your preferred airflow style is the setup to aim for.
The upfront cost is higher, but the long-term running costs are lower and the flavour ceiling is significantly higher.
For current device recommendations across all budget bands, check out our best vapes roundup which we keep updated throughout the year.
Managing Condensation: The One Thing Nobody Tells You
Condensation is a fact of life with Boro mods, and ignoring it will eventually cause problems.
Because vapour travels through a recessed chamber right next to the electronics, moisture accumulates behind and under the tank over time.
Here’s how to manage it:
- Keep the Boro tank pressed firmly into the cavity before tightening the flush nut so there are no gaps for vapour to escape sideways.
- Wipe down the Boro bay and the base of the tank each time you refill. If you’re running high wattage or using RDL airflow pins, consider picking up a condensation plug for your specific mod.
Condensation plugs are small inserts that live under the tank and route moisture toward the side airflow channels in the mod’s body rather than toward the screen and chipset.
The trade-off is a slight reduction in airflow volume, but for most users the protection is worth it.
The distinction between condensation and leaking is also worth knowing.
- Condensation is a slow accumulation of fine moisture that collects around the tank and in the bay over time.
- Leaking is rapid e-liquid loss with visible trails from the fill port, juice channels, or base of the bridge.
If you’re seeing actual liquid pooling quickly, you’re dealing with a wicking issue or a damaged o-ring, not normal condensation.
Troubleshooting Common Boro Problems
“Check Atomizer” or “No Atomizer” Errors
This is the most common issue new Boro users hit.
The most frequent causes are a bridge that isn’t fully seated in the tank, a tank that isn’t fully seated in the Boro bay, or the positive pin on the base of the bridge not making solid contact with the positive pin in the mod.
- Start by removing the tank and bridge, cleaning the base contact and the mod’s positive pin with a dry cloth, and reassembling.
- Make sure the bridge is fully clicked into the tank before inserting the assembly into the mod. Tighten the flush nut until snug but don’t overtighten.
If the error persists and your mod has an adjustable positive pin, raise it slightly in small increments and recheck resistance after each adjustment.
Burnt Hits from RBA Bridges
Burnt hits from a freshly built and wicked RBA are almost always a wicking problem.
- Either the cotton isn’t making proper contact with the juice ports (too thin, causing dry hits), or it’s packed so tight it’s choking liquid flow (still causes dry hits if the wick can’t saturate quickly enough).
- Pulse and strum your coils before wicking to eliminate any hot spots in the coil itself.
- Trim your wicks so they fill the juice ports without being compressed, and prime the cotton with a few drops of e-liquid before your first fire.
Leaking
Check your o-rings first. A damaged or dislodged o-ring on the bridge is the most common culprit.
If the o-rings are intact, the issue is usually over-filling (leaving zero air space in the tank), a wicking problem, or negative pressure from leaving the device in a hot environment.
For RBA builds, re-wick with enough cotton to fill the juice channels without choking them.
For more troubleshooting tips across all device types, our vape user guides section has you covered.
Boro Compatibility: What Fits What
This is the question that sends most beginners down a rabbit hole of forum threads. Here’s the simplified version.
- Most bridges designed for the Rev 4 Boro format will fit most modern Boro mods that are listed as “Rev 4 compatible.”
- Where compatibility gets complicated is in the details: chimney height, flush nut thread pitch, and the depth of the Boro bay can vary between mods.
- Some bridges that technically fit the standard dimensions may need a specific chimney adapter or a different nut to seal properly in certain mods.
The safest approach when you’re starting out is to buy a bridge that’s specifically listed as compatible with your chosen mod, or to buy a complete kit that includes both a mod and a bridge.
Once you understand how the pieces interact, branching out to third-party bridges becomes much easier.
Wrapping Up
Boro mods occupy a genuinely unique space in vaping. They’re not for everyone, and that’s fine.
But if you’ve outgrown pod kits and want a setup that rewards learning and investment, the Boro ecosystem delivers in a way that off-the-shelf pod mods and standard box mods really don’t.
The combination of real battery life, a genuinely open accessory ecosystem, and the option to rebuild when you’re ready makes it one of the most satisfying categories in the market right now.
Start with a complete kit from a reputable brand, pick up a stock coil bridge that matches coils you already know, and move to RBA when you’re comfortable.
The learning curve is real, but it’s not steep if you take it one step at a time.
FAQ
What is the difference between a Boro mod and a regular AIO? A standard AIO (all-in-one) integrates a proprietary tank and coil system that you can’t swap out. A Boro mod uses a standardised tank format (the Boro) with interchangeable bridges, meaning you can switch between different coil systems, airflow styles, and RBA builds without buying a whole new device. The modular nature is what separates Boro AIOs from conventional pod mods and AIOs.
Is a DNA chip worth the extra cost for a beginner? Probably not at first. DNA chips shine in temperature control mode and offer extensive software configuration through Escribe, but most beginners vape in wattage mode anyway. A quality proprietary board will serve you well while you’re learning the rest of the setup. Upgrade to DNA when you’re confident you’ll actually use the advanced features.
How do I know if my Boro is leaking or just condensing? Condensation is slow, fine moisture that accumulates around the tank and in the bay over hours or days of use. It’s clear and doesn’t smell strongly of e-liquid. Leaking is faster, produces visible trails of liquid from the fill port or base of the bridge, and is usually noticeable within minutes of filling. If you’re wiping the bay each refill and finding a little residue, that’s condensation. If you’re finding pools of e-liquid, something needs to be fixed.
What wattage should I start at with a new coil or RBA build? Start at the lowest wattage recommended for your specific coil (check the manufacturer’s rating) or, for RBA builds, start around 10-15W and work up slowly. Listen for any dry or burnt notes and back off immediately if you hear or taste them. There’s no prize for maxing out wattage from the start, and ruining a fresh build is a frustrating way to learn this lesson.
Want the inside scoop on the best Boro setups and new releases before anyone else? Subscribe to The Atomized newsletter and follow us on Facebook for daily updates from people who actually know what they’re talking about.