The Vaporesso Nexus is an all-in-one pod system and it runs the very impressive OMNI Board 4.0, one of the most advanced vaping chipsets in the business.
And today, we’re going to show you how to set it up properly…
Unboxing The Vaporesso Nexus – What You Should Have…

The contents of the box is pretty spartan. You should have the Vaporesso Nexus device itself, a spare NX coil, a microUSB charging cable, and a warranty card and a general (but completely unhelpful) manual.
The first thing you’ll want to do is charge the Vaporesso Nexus.
Take the USB cable and insert it into the device. Now, connect the Vaporesso Nexus to the mains and let it charge for 30/40 minutes.
How To Turn The Vaporesso Nexus On
This might sound simple, but it does tend to slip up a lot of users. Why’s that? Simple: the power on button is kind of hidden inside the chassis of the device. Once you know where to look, however, it’s easy.
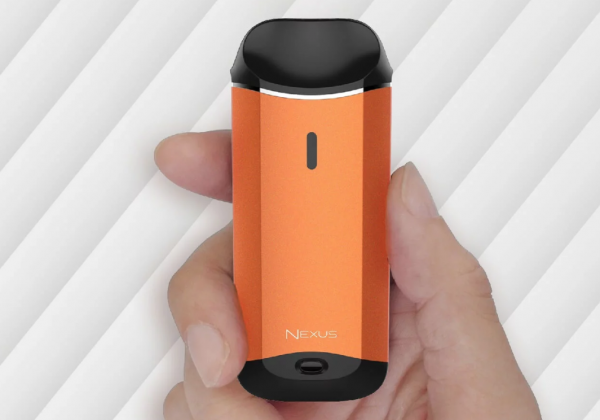
Basically, the power button, which you activate with three clicks, is located just below the “NEXUS” logo on the device. Once it is fully charged, simply tap it three times to turn the vaping device on.
How To Change The Coil (Just Remember: One Comes Pre-Installed)

You don’t need to add a coil right away, as the Vaporesso Nexus comes with one pre-installed. When the time comes to install a new, however, the process is really simple:
See the protruding metal bit in the picture above? Turn it counter-clockwise to remove the coil.
Now, remove the old coil and replace with a new one.
Add E Juice and let the coil head prime before use
Adding E Juice To The Vaporesso Nexus

This is the easiest part of the entire process: all you have to do is pull the rubber plug out – it’s located next to the coil head bit. Once you’ve done this add E Juice (preferably Nic Salts E Juice) through the hole.
Keep an eye on the glass opening on the front of the device to make sure you don’t overfill it. No one likes leaking.
How To Adjust The Airflow on Vaporesso Nexus
This is where things get a little more technical, but don’t be perturbed: this is such a cool feature, as you can adjust the tightness of the draw to get it pulling exactly to your liking.

To do this, simply twist the top of the coil head housing left or right until you find your perfect balance between tightness and flavor. I like mine tight as it goes, as I’m all about proper MTL vaping.
Quick Tip: turn counter-clockwise to open up airflow and clockwise to tighten it up.
Vaporesso Nexus LED System Notifications (What The Colors Mean)
The LED light on the Vaporesso Nexus has two functions:
- To let you know the device is switched on a working;
- To inform you of battery levels.
You can see the battery levels indicted by color below:

Cool Vaporesso Nexus Features – Things You Might Not Know About
As noted at the beginning of this post, the Vaporesso Nexus runs the OMNI Board 4.0 and this brings with it TONS of functionality and safety features.
One of the best ones, however, is Auto Temperature Control which essentially eliminates E Juice burn, so you NEVER get dry hits on the device.
Other cool features of the OMNI Board include:
- Short-Circuit Protection
- No Load Protection
- Low Power Protection
- Overcharge Protection
Vaporesso’s CCELL Coils Are Totally BADASS As Well
Vaporesso knows how to make a decent coil, and the CCELL which you’ll be using inside the Vaporesso Nexus is one of the best coil systems on the planet for pod mod vapes.
The CCELL coils are designed to deliver the E Juice, untainted, direct to the wire so that you get maximum flavor and vapor production – even at lower power outputs.
You have two options for coils with the Vaporesso Nexus: the NX CCELL coil (pre-installed) and the NX Coil (included in the pack).
Both are 1ohm coils and are rated for between 7 and 12w of power. Don’t worry about this though, as the Vaporesso Nexus will automatically figure out power settings all by itself.
Anything Else I Need To Know?
Not really! We’ve covered all the basics. One thing you definitely should know, however, is that the Vaporesso Nexus will charge from dead to 100% in 40 minutes.
It has 650mAh battery inside it, which is great for battery life, but what’s better is that when it runs down you can 100% recharge the device in the time it takes to watch an episode of Luther.
Not too shabby, right!?
Products Used In This Guide:
- Vaporesso Nexus | DirectVapor | $23.99 (FREE SHIPPING)
- NX CCELL Coils | DirectVapor | $9.95 (FREE SHIPPING)